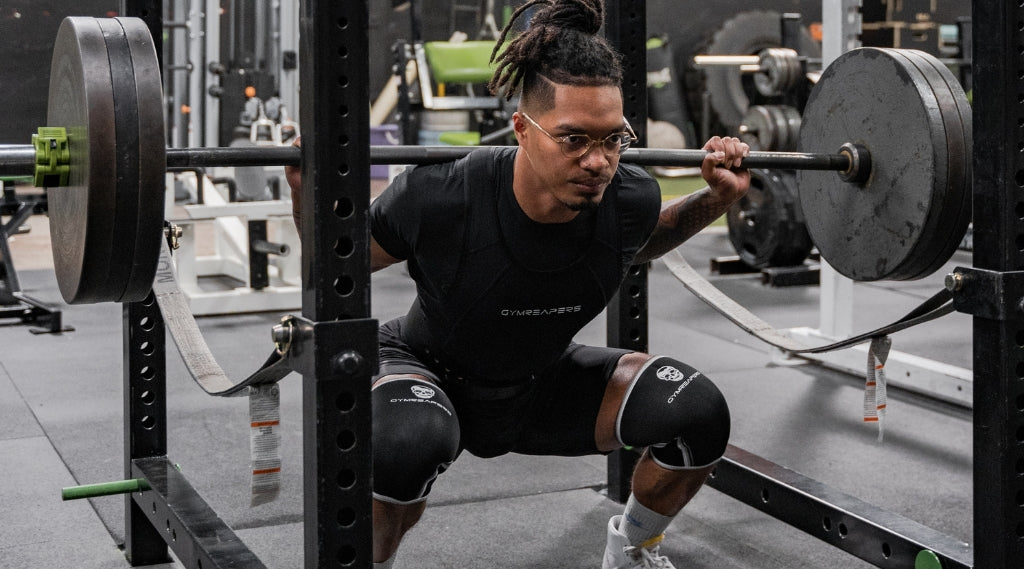
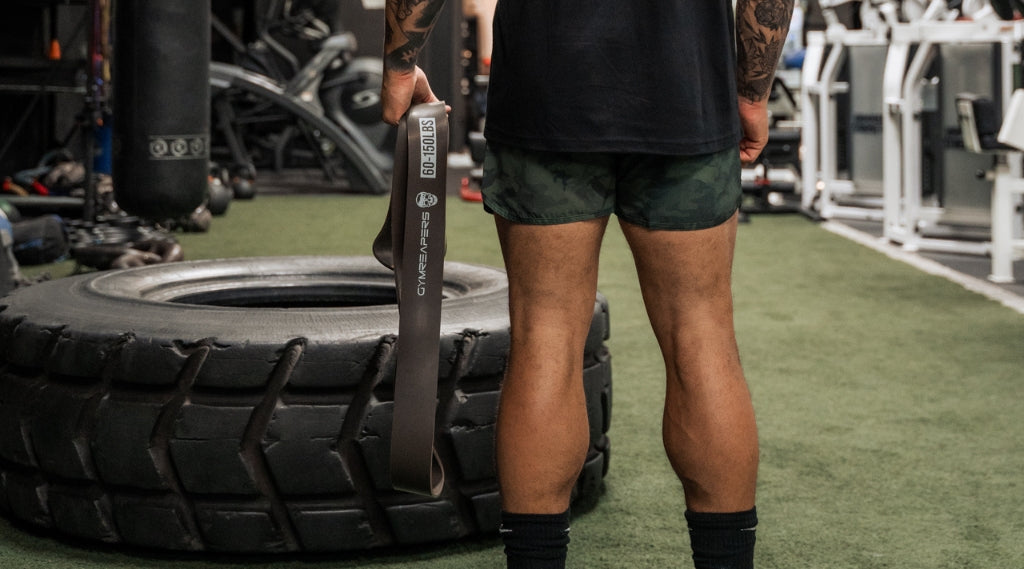
If you’ve reached a plateau with your squats or you just want to add more variety to your workouts to stay motivated to train, then I highly recommend incorporating the banded squat.
So what is a banded squat? A banded squat is a variation of the traditional squat exercise where a lifter squats against the added resistance of elastic bands. The resistance of the bands increases as the bands are stretched, which forces your muscles to work harder as you get closer to completing the rep.
To help you get the most out of your banded squats, I’ll explain which muscles this exercise targets, the benefits it offers, and how to perform it correctly. I'll also cover common mistakes and provide tips on how to incorporate them into your workout routine.
Key Takeaways
What Is A Banded Squat?
There are two different types of banded squats: one involves adding a band to a bodyweight squat to make it more challenging, and the other involves attaching resistance bands to a barbell to make barbell squats more challenging.
Regardless of the variation that you choose, the bands add increasing resistance to the standard squat, which forces your muscles to work harder the closer you get to the top of the movement.
This enables lifters to work on their lockout, increase the difficulty of the movement without adding more weight, and focus on acceleration and maximal force output.
In this article, I’ll touch on both banded squat variations but I will focus primarily on the barbell banded squat as it is more technical and requires more instruction.
Muscles Used In A Banded Squat

That accommodating resistance of a banded squat hits all the same muscles as a standard squat but puts more emphasis on the lockout.
The muscles worked include:
Quadriceps
The quadriceps, or quads, are the prime movers in any squat, as they are responsible for extending your knees. Your quads work to help you maintain control as you lower into the bottom position of a squat and then propel you out of the bottom position to return to a standing position.
Glutes
The gluteus muscles (gluteus maximus, medius, and minimus) play a significant role in hip extension during the squat. The tension from the bands in a banded squat demands more force from the glutes, making it a great glute-building exercise.
Hamstrings
While the hamstrings act primarily as stabilizers in a squat, the additional resistance from the bands also engages these muscles, particularly when you reach the bottom of the squat.
Core Muscles
Your abdominal and lower back muscles are also active to help maintain balance and stabilize your torso during the lift, which becomes increasingly more difficult as the band is stretched.
Benefits Of Banded Squats
Banded squats offer a variety of benefits, which include:
- Increased Strength and Power: The variable resistance provided by the bands can enhance strength and power, especially at the top of the squat where the tension is highest.
- Improved Stability and Form: Banded squats demand greater control and stability, leading to improved squat form and overall body awareness.
- Versatility: Bands can be used with or without additional weights, making banded squats a versatile option that is suitable for a variety of fitness levels and equipment access.
- Acceleration Training: The added resistance promotes faster acceleration and power during the upward phase of the squat, which is beneficial for athletic performance and overall force output while lifting (a key component for powerlifting training).
How To Perform Banded Squats Correctly
The following instructions are for setting up a barbell banded squat.
Step 1: Choose The Right Band
Before you begin, select a suitable resistance band from Gymreapers' collection. The band should provide sufficient resistance to challenge you, but not so much that it compromises your form.
It should be used in combination with at least 40-60% of your working weight loaded onto the bar.
Ensure you use matching bands on each side of the barbell so the resistance is even and doesn’t throw you off balance.
Step 2: Set Up The Band
Anchor your chosen band to a sturdy cross support at the bottom of a squat rack. Ensure the band is anchored directly underneath where you will be standing when you squat, rather than where the bar is racked.
If the band isn’t anchored underneath you when you’re squatting, then it will pull you forward or backward while you squat.
If your rack doesn’t have cross supports then you could anchor the band to heavy dumbbells (100 lbs+) on the floor outside of your squatting area. Ensure these anchors are safe and effective by starting with an empty barbell and working your way up before attempting your full working weight.
Step 3: Position The Barbell
Wrap the other end of the band around the barbell sleeves at the same distance on each side, so that the tension on the bar is evenly distributed. The band should either be just inside the sleeves/collars of the barbell, or outside of the weight plates.
Step 4: Get Into Position
Step under the barbell and position it across your shoulders as you would in a regular squat. Take a few steps back to clear the pins and set your feet shoulder-width apart with your toes slightly pointed out.
Step 5: Prepare For The Squat
Before you initiate your squat, brace your core, pull your shoulder blades together, and ensure your chest is up and your back is straight.
Step 6: Perform The Squat
Lower your body into a squat position by bending at your knees and hips, going as deep as your mobility allows (usually until your hips are slightly below the top of your knee).
Keep your knees in line with your toes to prevent them from caving in and maintain tension in your core and upper body.
Step 7: Return To Starting Position
Push through your legs to extend the knees and return to a standing position.
The tension from the band will increase as you stand, so keep your core and upper body tightly braced to allow the force from your legs to push up against the resistance to return you to a standing position.
Step 8: Repeat
Perform the desired number of sets and reps while maintaining form and control.
Note: For a banded squat using only a resistance band, you can loop the band around your shoulders and under your feet and follow steps 5-8 above.
5 Banded Squat Mistakes (And How To Fix Them)
With the increased challenge that the bands provide, comes new mistakes that you can make that compromise the effectiveness of the exercises and your safety.
Here are several common mistakes and how to avoid them.
Mistake #1: Improper Band Selection
Selecting a band that is either too strong or too weak for your current strength level can lead to ineffective workouts or even injuries.
How to Fix It
Choose a band that provides sufficient tension to challenge your muscles, but not so much that it compromises your form or makes the exercise unsafe. As a general rule, the band should be added to about 40-60% of your working weight that you’d use for a given set/rep range.
For example, if you usually squat 225 for sets of 5, you’d want to use 90-135 lbs on the barbell and then add resistance bands that make the squat feel like 225-275 at the top. You’ll only “feel'' 90-135 lbs at the bottom of your squat, and feel the full tension of 225-275 at the top.
Mistake #2: Improper Band Setup
If the band is placed too far forward or backward, it can throw you off balance, leading to improper form and potential injuries.
How to Fix It
Ensure that the band is evenly secured on both sides of the barbell and the anchor point. The band should be centered on the barbell, and the anchoring points should be sturdy and reliable. Always double-check the setup before starting your squats.
Mistake #3: Adding/Removing the Bands Individually
The tension from a band can be quite strong, and adding or removing a band from one side without assistance can cause the barbell to be pulled aggressively off the rack to one side, flinging the barbell and dumping plates. This can be dangerous and could lead to serious injury to yourself or others.
How to Fix It
Always have a spotter assist you when adding or removing bands from the barbell. If a spotter is not available, use a method that allows for a balanced adjustment, such as unloading the bands before removing the weights. Safety should always be your first priority.
Mistake #4: Over-Reliance on Banded Squats
While banded squats are an excellent exercise, they shouldn’t completely replace other types of squats or leg exercises as this would limit your strength development and lead to muscular imbalances over time.
How to Fix It
Banded squats are just one tool in your training toolbox. They should complement, not replace, your regular squat routine or other leg exercises. A well-rounded workout routine will ensure balanced muscle development and overall strength.
Mistake #5: Not Progressing Your Banded Squats
As with any exercise, your body will adapt to the challenge of banded squats over time. If you don't progress the exercise, whether through increased band tension, additional weight, or more repetitions, your strength gains may plateau.
How to Fix It
Make a point to continually challenge yourself by adding more tension, increasing the weight, or doing more reps as your strength improves. Keep track of your progress to ensure that you're consistently pushing your limits. This progressive overload will ensure that you continue to make strength gains over time.
How To Incorporate Banded Squats Into Your Workout Plan

If you’re ready to add banded squats to your program, then you’ll need to consider the following variables:
Frequency
Including any kind of squats in your routine 1-2 times a week is generally a good starting point. This gives your muscles adequate time to recover between sessions while still maintaining the stimulus required for growth and strength gains.
Banded squats would best be incorporated into one of these two squat days, allowing you to enjoy the variation that comes with it, while still having another day to dedicate to a different squat variation.
Sets and Reps
There are two primary methods to structure your sets and reps for banded squats.
The first is to perform your normal sets (typically 3-5) with your desired rep range (often 5-12) using bands for added resistance. This method is best for those pursuing muscle and strength gain.
The second is following the Dynamic Effort Method. This involves performing 6-8 sets of 2-3 reps with maximum acceleration using loads that are 40-60% of your one-rep max. This method focuses on speed and acceleration in an effort of improving maximal force output, and less on pure strength or muscle growth.
Load/Weight
The load or weight you use will largely depend on your strength level and the particular goal of the workout. If you're following the Dynamic Effort Method, stick to 40-60% of your one-rep max as previously mentioned.
For other workouts, choose a load that allows you to complete your desired number of reps with good form but is still challenging, especially for the last few reps.
Timing/Placement in a Workout
Banded squats are a compound, multi-joint exercise that requires a lot of energy to perform correctly. Therefore, it's often best to do them towards the start of your workout, after a warm-up, when you're most fresh.
However, if you're pairing them with heavy, non-banded squats, you might prefer to do the banded squats later in the workout to use them as a burnout or finisher exercise. Remember, there's no one-size-fits-all answer here – the best placement depends on your workout routine and goals.


Hinterlasse einen Kommentar
Alle Kommentare werden vor der Veröffentlichung geprüft.
Diese Website ist durch hCaptcha geschützt und es gelten die allgemeinen Geschäftsbedingungen und Datenschutzbestimmungen von hCaptcha.