As a personal trainer, part of my job is to teach my clients how to use various gym tools to elevate their training. This includes the often-overlooked arm blaster.
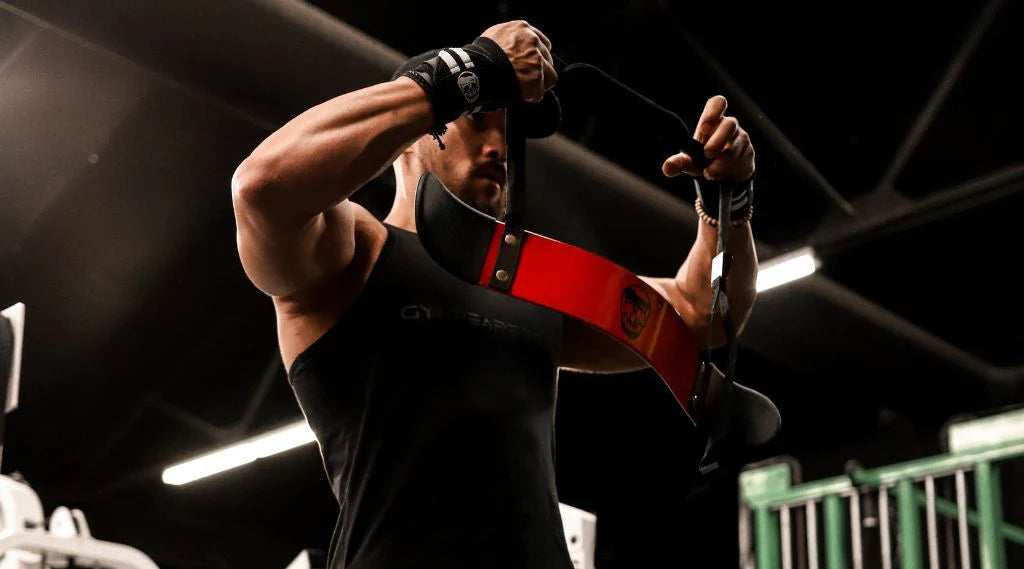
An arm blaster is a long, flat metal piece of equipment that is positioned against your upper abdomen. The objective is to place the back of the upper arms against the metal plate to improve technique and muscle activation on bicep curls and some tricep exercises.
Using an arm blaster isn’t complicated, but there are some details trainees must be aware of to get the most out of the tool and minimize the risk of injury.
Key Takeaways
- An arm blaster promotes better technique and muscle activation by keeping the elbows stationary and restricting back-and-forth movement.
- The ideal position for an arm blaster is against the upper abdomen. It allows trainees to place the area just above their elbows against the curved edges for support.
- My favorite arm blaster is the Gymreapers Arm Blaster because it has a padded neck strap, it’s easily adjusted, and it comes with a 1-year replacement guarantee.
Arm Blaster: Overview

An arm blaster is a popular but underutilized piece of training equipment. It is essentially a long, flat aluminum piece with curved edges and an adjustable strap designed to keep your arms stationary during bicep curls.
Some trainees also use the arm blaster for tricep exercises, such as the rope cable arm extension.
The goal is to place the strap around your neck, position the arm blaster against your torso, and place the back of your upper arms against it for stability.
"The main reason why many lifters continue to use the relatively old-fashioned arm blaster is simply; it is very effective at its intended purpose of improving biceps development."
- Debbie Luna, fitness content writer, powerlifter, and Olympic lifter
Benefits Of Using An Arm Blaster

The benefits of using an arm blaster include:
Form Correction
With your upper arms against the arm blaster, your elbows are less likely to move forward or back, promoting better form on movements like bicep curls. In contrast, performing curls without the use of an arm blaster makes it easier to move your elbows back and forth, which inevitably affects the range of motion and bicep activation.
Muscle Activation
Most trainees report feeling their biceps working harder during curls when using an arm blaster. This is because keeping the elbows from moving forward and back isolates the biceps and forces them to do more work, leading to better activation and potentially more growth.
Strength Gains
The arm blaster’s ability to improve technique and boost muscle activation makes it a fantastic tool for building bicep strength. This is highly beneficial as it allows you to curl and row more weight, as well as do more chin-ups and pull-ups.
Versatility
Despite its simplicity, the arm blaster can be the perfect addition to countless bicep exercises and a few tricep exercises, allowing you to step up your training and encourage more growth.
How To Use An Arm Blaster: Step-By-Step Guide

- Place the nylon strap over your head and behind your neck with the metal piece hanging in front of your body.
- Adjust the arm blaster strap to the ideal length. The area just above your elbows should be pressed against the curved ends of the arm blaster. For most people, this means having the arm blaster resting against the upper abdomen.
- Grab your weight(s) (like a barbell, dumbbells, or cable attachment).
- Stand tall and position the back of your upper arms against the curved ends of the arm blaster.
- Assume a comfortable stance, take a deep breath, and engage your abs.
- Perform a bicep curl (or tricep extension), squeezing your muscle forcefully at the end range.
- Slowly control the weight back to the start position as you exhale. You will notice that your elbows remain at your sides, and your muscles work much harder to complete the eccentric portion of each rep.
6 Common Arm Blaster Mistakes
To maximize the benefits of the arm blaster, it’s important to avoid the following mistakes:
Mistake #1: Incorrect Strap Length
The most common mistake I see is trainees shortening the neck strap too much and having the arm blaster resting on their chest. This makes for a more awkward and less effective position, especially for curls.
How To Fix
Adjust the strap to a length that allows the arm blaster to rest against your upper abdomen. For most people, the ideal length would be to have the area just above the elbows to be positioned against the curved edges of the arm blaster.
Mistake #2: Using Momentum
When trainees first start using an arm blaster, they will likely notice that the inability to move their elbows back and forth affects their performance, forcing them to use less weight. Some lifters try to continue lifting the same amount, which typically results in swinging the body and using jerking motions to do the same number of reps as before.
How To Fix
Leave your ego at the door and reduce the amount of weight you use when you wear an arm blaster, at least initially. Doing so will help you get used to the new technique requirements, produce better results, and reduce your risk of injury.
Mistake #3: Shortening the Range of Motion
Another common mistake that occurs when you use a weight that’s too heavy with the arm blaster is having to shorten the range of motion because you’re not strong enough to perform the full repetition. Shortening the range of motion will affect your results because you’re not strengthening the full range of motion and you’re limiting muscle activation, which means less growth potential.
How To Fix
The fix here is the same as for the previous error. Reduce the amount of weight you’re using and be mindful of your technique to ensure you’re getting the most out of your arm blaster training.
Mistake #4: Not Resting Your Elbows On the Blaster At All Times
Not resting your elbows on the metal plate is a less common mistake but one you should still be mindful of. While the elbows cannot travel back during the eccentric (lowering) phase, they can move forward as you curl the weight. As a result, you might struggle to flex your elbows to the same degree and activate your biceps for optimal growth.
How To Fix
Keep your upper arms glued to the arm blaster at all times. There should not be any daylight between your elbows and the plate throughout the set.
Mistake #5: Poor Posture
Arching the lower back or rounding the shoulders can occur on many exercises, including bicep curls with an arm blaster. Upper back roundness occurs when trainees position the arm blaster too low on their torso, which forces them to hunch over to get their elbows low enough. Rounding the upper back might not affect bicep curl mechanics, but it could contribute to poor posture and eventually lead to neck pain. Similarly, lower back arching can place unnecessary stress on the spine, eventually leading to pain.
How To Fix
Position the arm blaster at the appropriate height, typically resting against the upper abdomen. You should be able to place your upper arms against the metal plate and keep your shoulder blades retracted (squeezed together). Additionally, you should engage your abs at the start of the set to draw your ribcage closer to your pelvis to reduce the risk of back arching. Take a deep breath and squeeze your abs at the start of the set. You can also squeeze your glutes for additional stability, especially when curling more weight for 8-10 reps.
Mistake #6: Forgetting to Breathe
Holding your breath is not beneficial for a couple of reasons. First, it reduces oxygen delivery, which is necessary for energy production in your muscles. Second, it makes you winded. In both cases, your performance will likely suffer, and you would be forced to stop a set before exhausting your biceps which means that you’re limiting your results.
How To Fix
Take a deep breath as you’re about to curl the weight and exhale at the top and as you extend your arms. Practice this sequence before using heavier loads to ensure that you can breathe properly as the weight gets more challenging.
How To Implement An Arm Blaster Into Your Training
Let’s discuss some important training details on how to use an arm blaster in your routine:
Arm Blaster Exercises
The arm blaster is an excellent addition to many bicep exercises and a couple of tricep movements. Movements where the arm blaster can help include:
- Barbell and EZ-bar bicep curl
- Standing dumbbell and cable curl (with elbows to the sides)
- Hammer curl
- Reverse-grip dumbbell, barbell, EZ-bar, and cable curl
- Zottman curl
As briefly mentioned, the arm blaster can also be a good addition for tricep movements like the cable pressdown, where the goal is to have your elbows at your side.
Frequency
Training muscles two to three times per week is generally best to promote growth and strength gain. This allows for better volume allocation (not having to do as many sets in any given workout) while still promoting recovery. Smaller muscles like the biceps and triceps tend to recover more quickly than larger ones, so training them once every seven days would cause you to miss out on better results.
Exercise Order
You should always start your training with compound (multi-joint) exercises (like bench presses, squats, and deadlifts) while you’re still fresh, and move on to isolation lifts (like the bicep curl) near the end of your sessions.
In terms of when to use the arm blaster for your bicep exercises, there are a couple of options:
- The first bicep movement, where you’re using more weight: the arm blaster could help you maintain proper form and potentially build more strength.
- The second or third bicep movement, where you’re using less weight: the arm blaster could promote better form, allowing you to thoroughly exhaust your biceps with high-rep sets and cause more metabolic stress, which could build more muscle.
Progression
Making steady progress in your training is essential for continuing to build muscle, whether you use an arm blaster or not. Placing increasingly more stress on your muscles forces them to continue to adapt by getting stronger and bigger. That said, progress in the form of doing more reps or lifting more weight should never come at the expense of proper form. This is one reason the arm blaster is such a valuable tool, as it makes it harder to “cheat” the movement.
Arm Blaster: My Top Recommendation
SHOP ARM BLASTER
I strongly recommend the Gymreapers arm blaster for your training needs. It’s durable, gets the job done, and has a comfortable neck strap to prevent bruising.
The heavy-duty aluminum construction ensures a sturdy feel and durability. Its contoured shape allows the blaster to fit more comfortably on your chest or upper abdomen, leading to a more comfortable experience, even when curling more weight. Both ends of the frame are capped, which creates friction between your arms and the blaster while keeping you comfortable and confident in your training. Combined with the rounded edges, your arms feel far more secure, allowing you to push yourself close to failure without worry.
The nylon strap is adjustable, which allows you to set the arm blaster at the perfect height regardless of your anatomy and unique needs. You can also pick from three color options: classic black, red, and green. To top it off, Gymreapers offers a 1-year replacement guarantee.


Leave a comment
All comments are moderated before being published.
This site is protected by hCaptcha and the hCaptcha Privacy Policy and Terms of Service apply.